Creativity Corner Crafts
Published on April 27, 2020 - Updated on June 01, 2020
Suggestions for Creative Fun From Our Homes To Yours
If you've been loving our Creativity Corner, you'll love this log of all of our favorite crafts collected right here!
We can’t wait to see your finished products, so please share them with us on Instagram @gethappyly! Happy crafting!
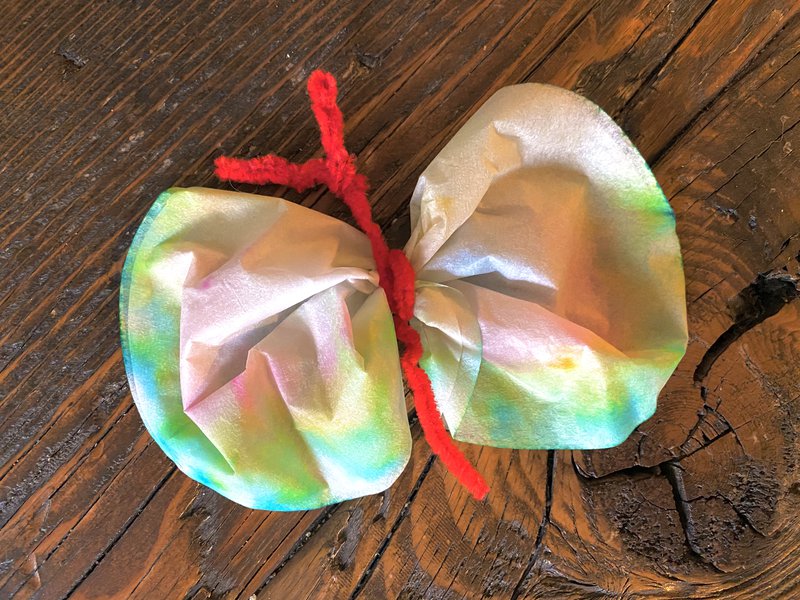
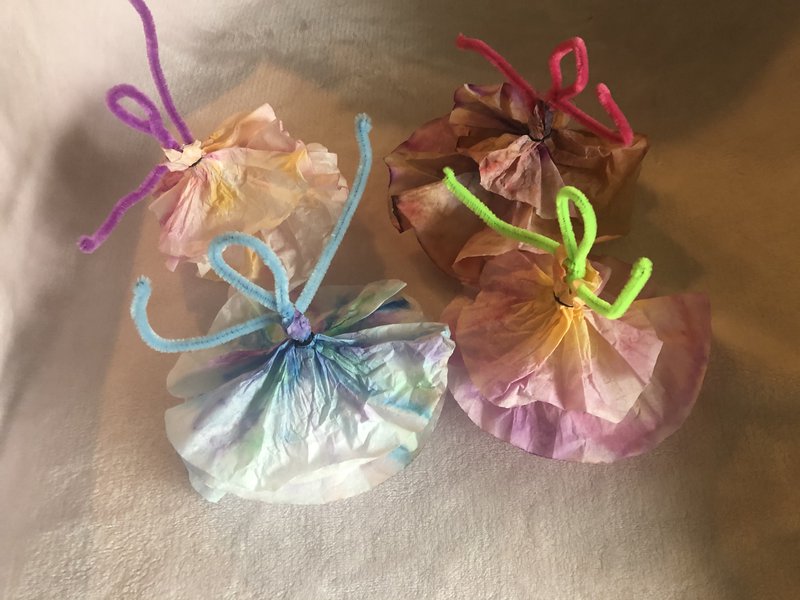
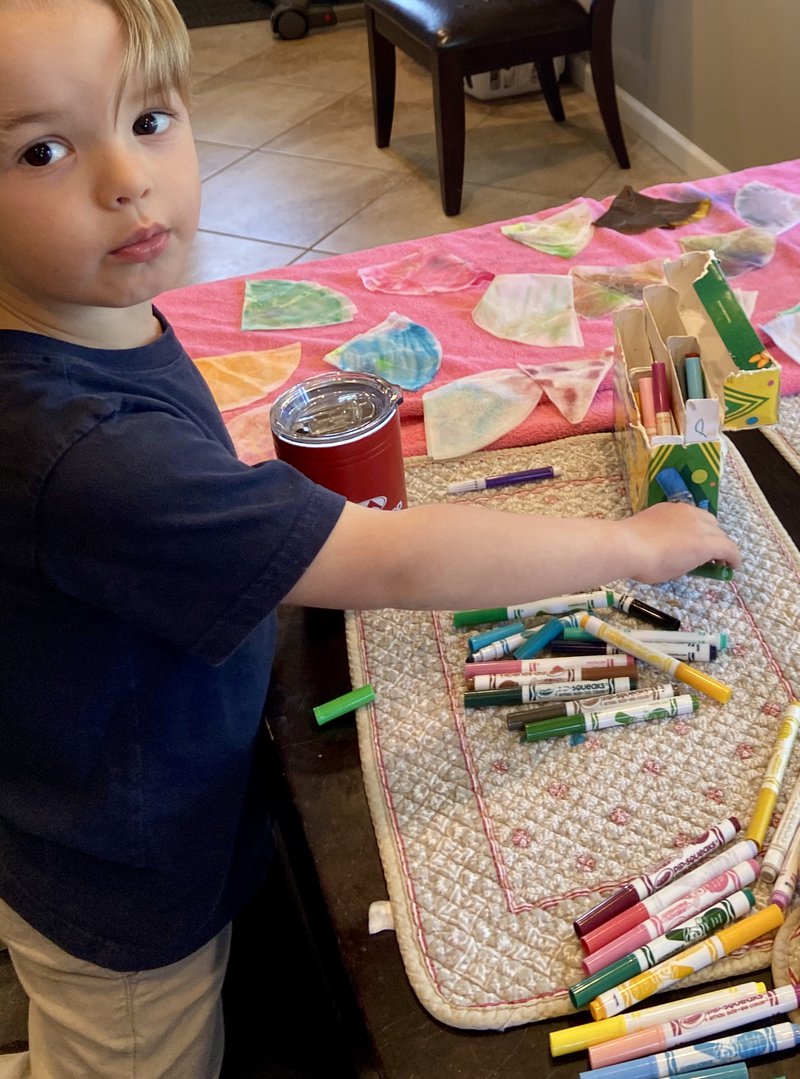
Coffee Filter Butterflies
Materials:
- Markers
- Coffee Filters
- Pipe Cleaner
Start off by decorating your coffee filter with your markers. Make patterns, squiggles, or whatever kind of designs you'd like. When you are finished, gently and slowly drip some water onto your coffee filters. Watch as the beautiful colors start to spread, giving off a tie dye like appearance. Be careful not to get your filters too wet, as the colors will fade and blend together making it look more brown than anything else. After you're done, let the filter dry in a dish rack. When your butterfly wings are dry, wrap a pipe cleaner around the center of the filters, and adjust the wings to your liking. Twist in some antennas and voila!
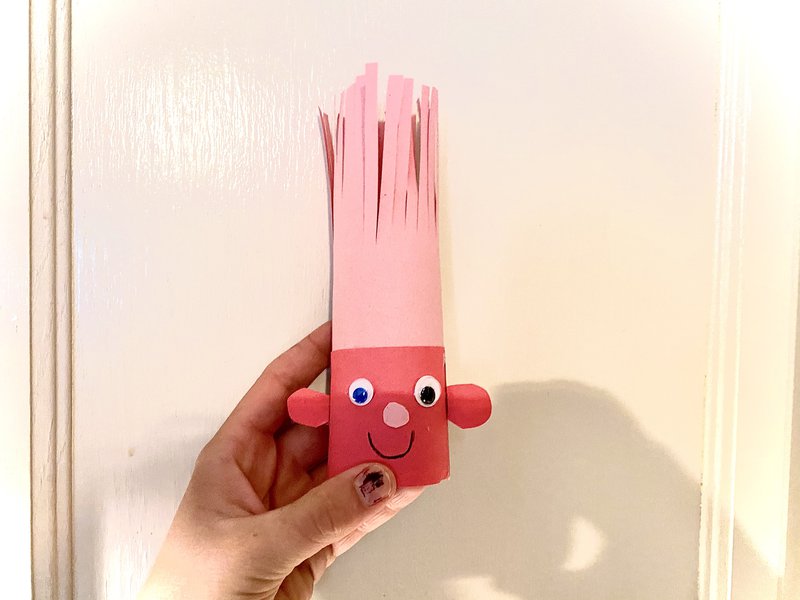
Troll Haircut
Materials:
- Toilet Paper Roll
- Construction Paper
- Google Eyes
- Glue
- Coloring utensils
- Scissors
For the face layer, wrap the construction paper around the toilet paper roll and glue it on with a hot glue gun preferably. With a slightly longer piece of construction paper, do the same thing, but make sure it extends past the top of the toilet paper roll a few inches. This will be the trolls hair! To create hair, cut strips almost to the base of the toilet paper roll. After, cut our some ears and a nose and stick google eyes on and decorate however you would like! Make one or make a bunch!
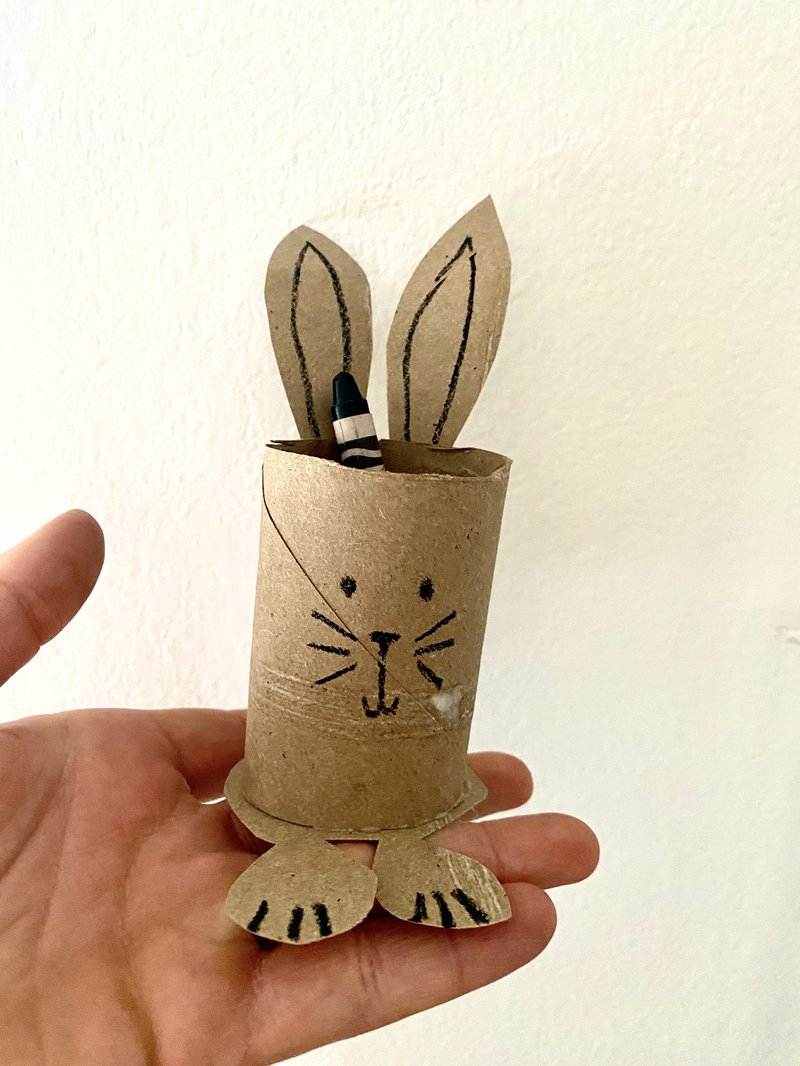
Animal Crayon Holder
Materials:
- 2 Toilet Paper Rolls or a paper towel roll
- Construction Paper
- Decorating Materials
- Pom Pom
Start off by cutting your toilet paper roll to your desired cup length. After this is complete draw and cut out two rabbit ears and two rabbit feet on the other toilet paper roll. Cut out a circle for the bottom as well. Glue everything onto your toilet paper roll as shown in the photo above. Glue on a pom pom to the back of the rabbit, and then draw its face to your liking. Decorate your bunny in any way you please and fill it with your crayons! It makes the perfect holder for a child's craft space or desk. You can also get creative and make other animals too!
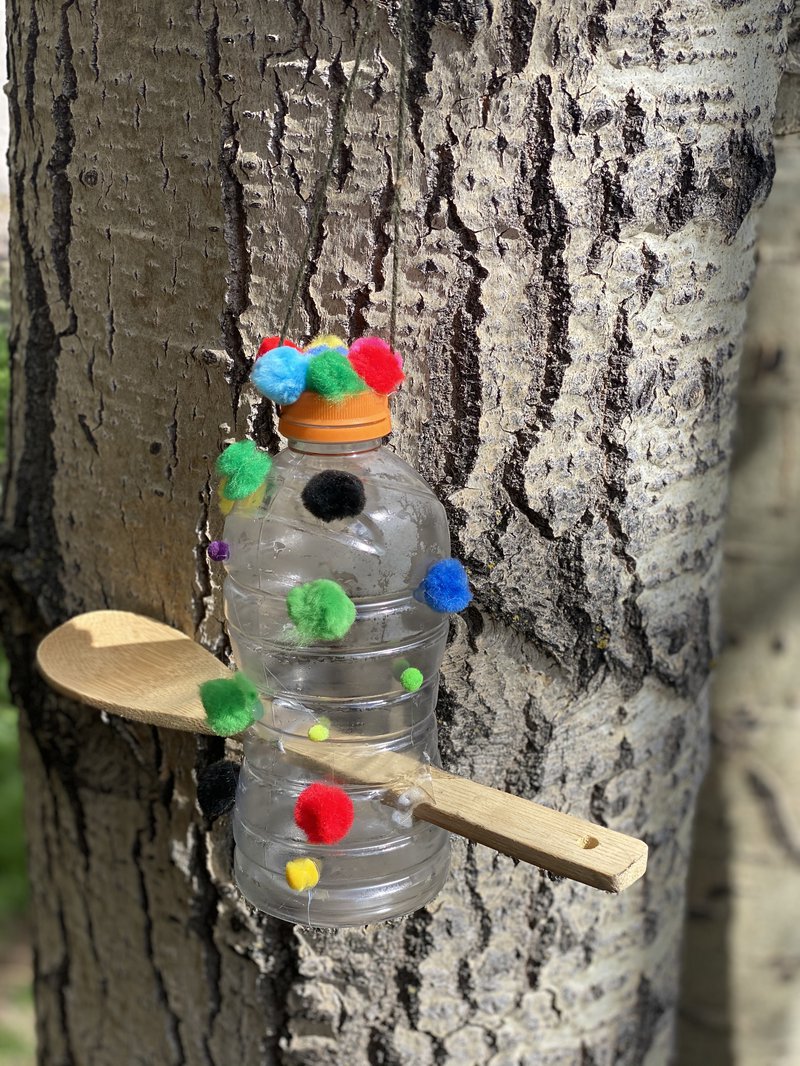
Water Bottle Bird Feeder
Materials:
- Water bottle, milk carton, or some type of bottle you can cut through
- One or two wooden spoons
- Scissors
- Decorations
This is a cool craft that is also highly functional! To start off making this bird feeder, you should plan out where you want the holes to be. Make them even enough to be able to get the wooden spoon through each side, and include extra space above so that some of the bird feed can fall out onto the spoon. Attach a string with hot glue to the bottom side of the bottle cap long enough to hang the bird feeder from a branch of your choice. Decorate in whatever way you would like, fill it with bird feed, and then watch as the birds come over for a snack!
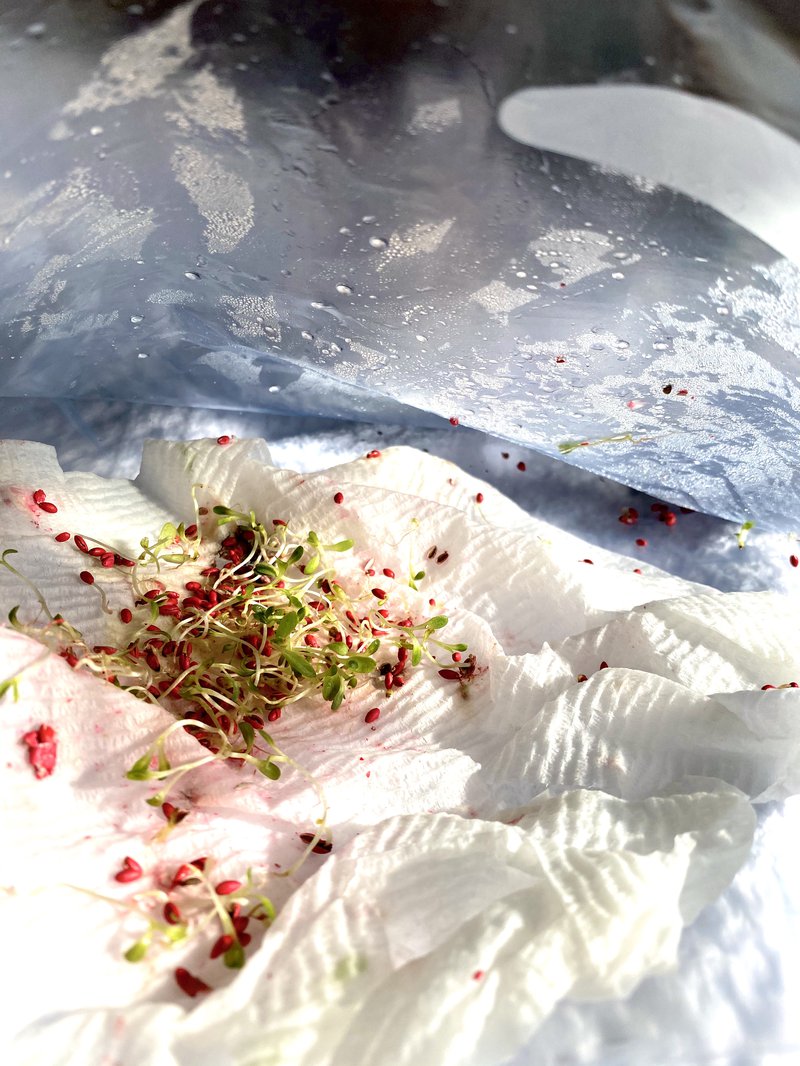
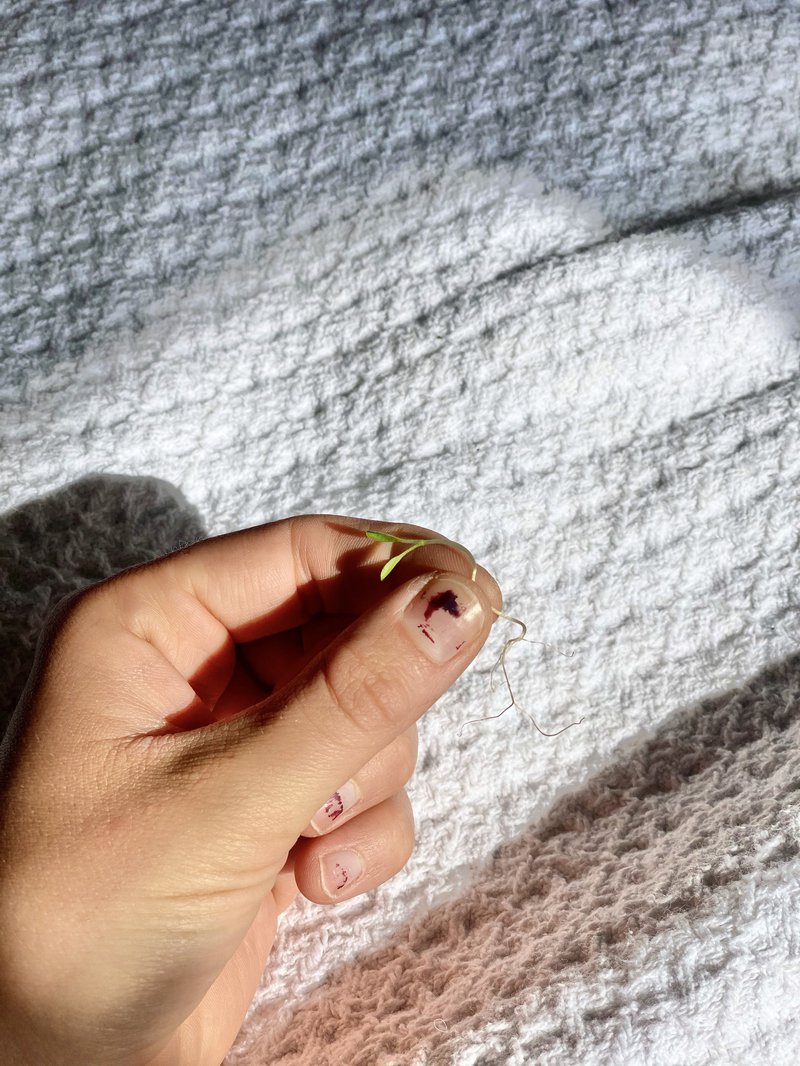
Plant Babies
Materials:
- Gallon Zip Lock Bag
- Paper Towel
- Seeds
- Water
This is a fun project for kids of all ages to learn about how plants and food grow. Start off by getting your paper towel wet. Fold it in half and sprinkle some seeds onto it. You can do a bunch or a few, as long as there is room. Slide the towel into the bag, zip it shut, and put it in a dark, warm environment, such as a closet for a few days until the seeds start to sprout. Once they do, place the bag in a sunny windowsill or hang it up in a window and watch the plant babies grow! When they're a few inches big, you can transfer them to soil!
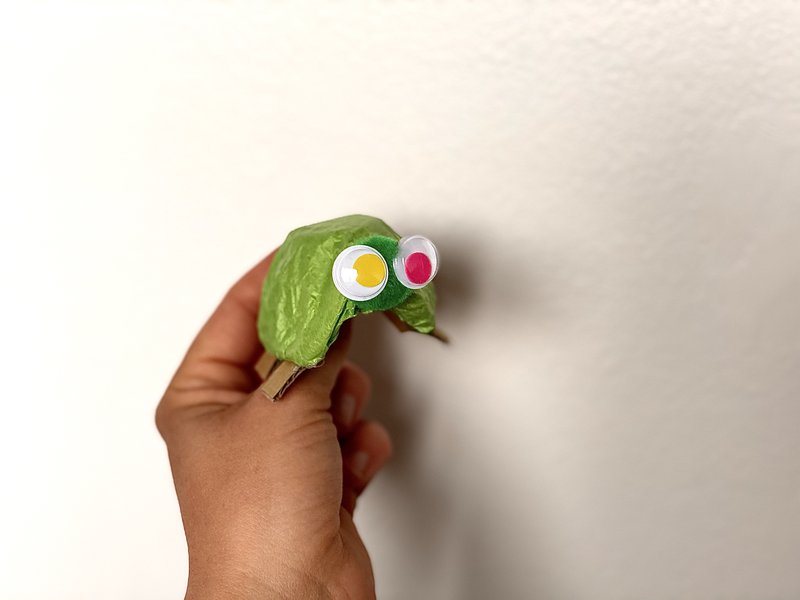
Egg Carton Turtles
Materials:
- Egg Carton
- Scissors
- Paint or markers or tissue paper for the body
- pom for the head
- pipe cleaners or small cardboard pieces for legs
- google eyes
- Hot glue gun
Start off by cutting one of the rounded shells out of the egg carton. Once you have this dome, color, cover it, or paint it green. Put spots on it if you'd like to! Use pipe cleaners or 4 slivers of cardboard for legs and hot glue them in a square formation to the bottom of the dome. Attach a pom pom as the turtle head, and then place google eyes in their appropriate location. Make tons of these cute little turtles to play with!
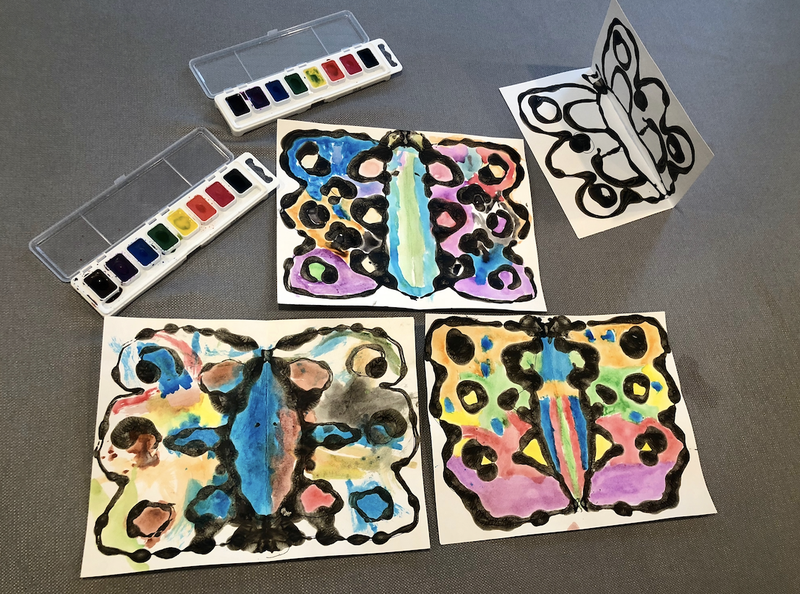
Colorful Glue Butterfly
Materials:
- Cardstock
- Writing Utensil
- Elmers Glue
- Small Baggie
- Paint (Regular and Watercolors)
- Paint Brush or Sponge
Fold a piece of card stock quality paper in half and draw half of a butterfly in pencil (or pen). Put some Elmers glue and black paint in a small baggie and blend it gently with your fingers in the bottom corner. Then cut a very tiny little point off and use it like a pastry bag to trace the lines. Fold the paper back the other way and gently press the paper (not too hard). Open up and let dry flat (or use a blow dryer to speed the process). Then use your watercolors to create your beautiful butterfly.
Friendship Bracelets
Materials:
- Beads, macaroni, or homemade paper charms
- Yarn, string, floss, or whatever you have laying around for string
Get creative with some sewing string, floss, yarn, macaroni, or beads and make some friendship bracelets. If you want some ideas for making beads with just paper and glue, check out this awesome tutorial!
Coffee Filter Dancers
Materials:
- Pipe Cleaners
- Coffee Filters
- Markers
- Spray Bottle or Dropper
- Tiny Elastics
Start off by folding two or three stacked coffee filters in half twice and draw lines on both exposed sides in different patterns with a couple of colored markers. Use a spray bottle or dropper to saturate them. Let them dry or use a hair dryer to speed the process. Cut the very point of the folded filters and a slit on either side of that cut. Bend the pipe cleaners into the shape of arms and a head and stick the bottom end of the pipe cleaner through the center of the coffee filters (add 1 or 2 under the first layer for more fluff and so they stand on their own) and slide the arms through the slits. Now tie the waistline of your dancer or wrap a tiny rubber band around to synch the waist and so the coffee filter stays attached! Bend the arms to appear that they are mid-dance.
Thank you to One Little Project for this sweet and creative idea!
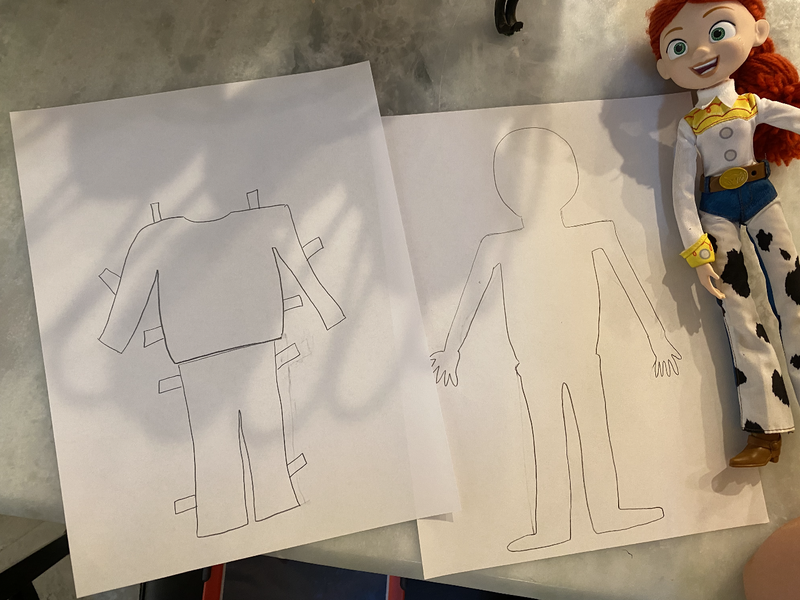
Paper Dolls
Materials:
- Your children's dolls
- Paper
- Tracing Material
- Decorating material
Lay your doll down and begin carefully tracing the outline of their body. Cut this out and use it to judge how big to draw the clothes. Create articles of clothing on sturdy paper and add small notches so that you can fold the clothes over the paper dolls body. Decorate to your liking!
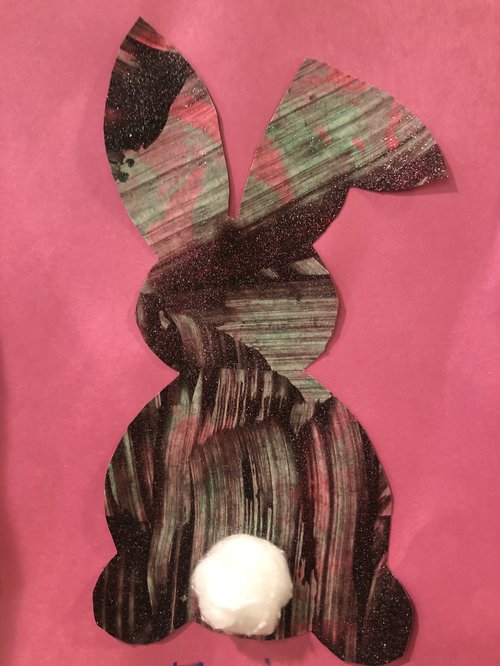
Bunny Art
Materials:
- Paint Supplies
- Paper
- Cotton Balls
- Template
To begin, you'll want to print out the template we've provided above (or create your own) on a piece of hard stock paper. Flip the template to the blank side to make sure you can still see the bunny when it’s time to cut it out. Choose two paint colors to drip over the back of of it. Cut out a small piece of cardboard from a delivery box and instruct your children to smear the paint around the page in whatever way they are inspired. After the paint is all dry, glue on the bunny tail and decorate the edges with glitter glue or other decorations.
If you’re feeling motivated, make a bunch and string them up as an Easter decoration! Another option is to share the project with cousins and make sure their grandparents have a memorable Easter gift from all their little ones.
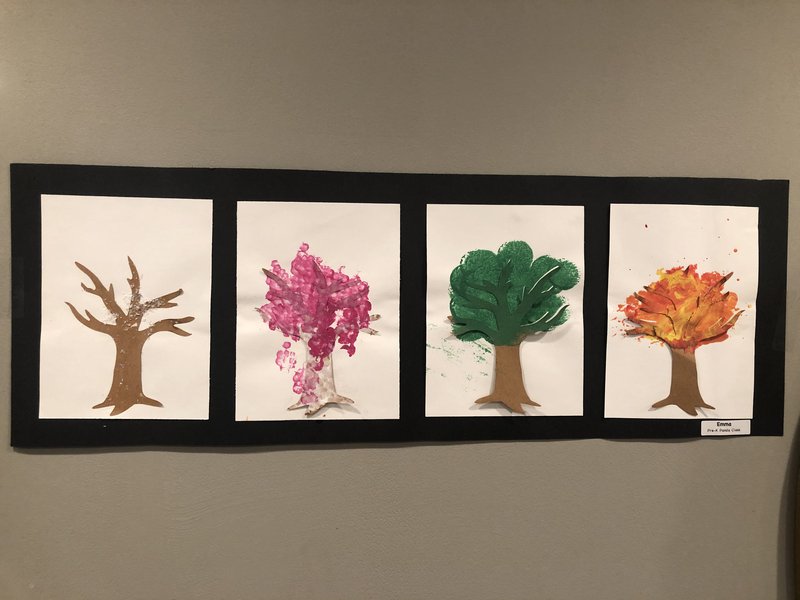
Seasons of Trees
Materials:
- Paint Supplies
- Paper
- Scissors
- Glue
- Decorations
Teach your children about the change in seasons while you create this beautiful nature inspired artwork. Start by laying out your four pieces of background paper, before helping your child trace and cut out the trunk and branches. After you glue the trees to their paper, let the decorating begin! Encourage them to draw from their experiences with each different season.
Mount the four creations to a longer piece of paper afterwards for an aesthetically pleasing presentation that can decorate your home all year long.
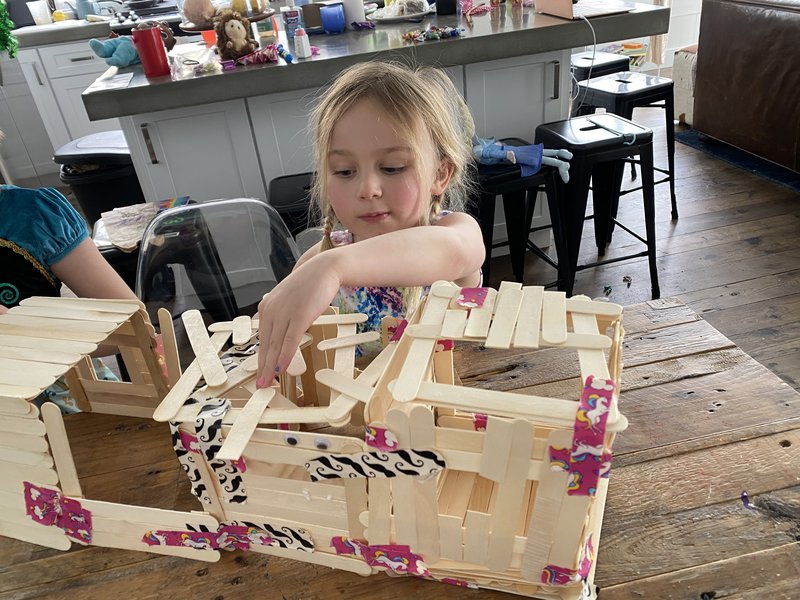
Popsicle Stick Houses
Materials:
- Popsicle sticks (multiple packages if possible)
- Glue (glue gun is great if you have one or elmers, although it takes a while to dry)
- Markers for decorating or paint if you’re feeling inspired for a mess
- Glitter, gems or beads for decorating
We were inspired by this video on YouTube to make a popsicle stick house but ultimately we made an imperfect, abstract house with all three kids mini creations. The best part was that it turned into an active play space for Calico Critters and other small toys!
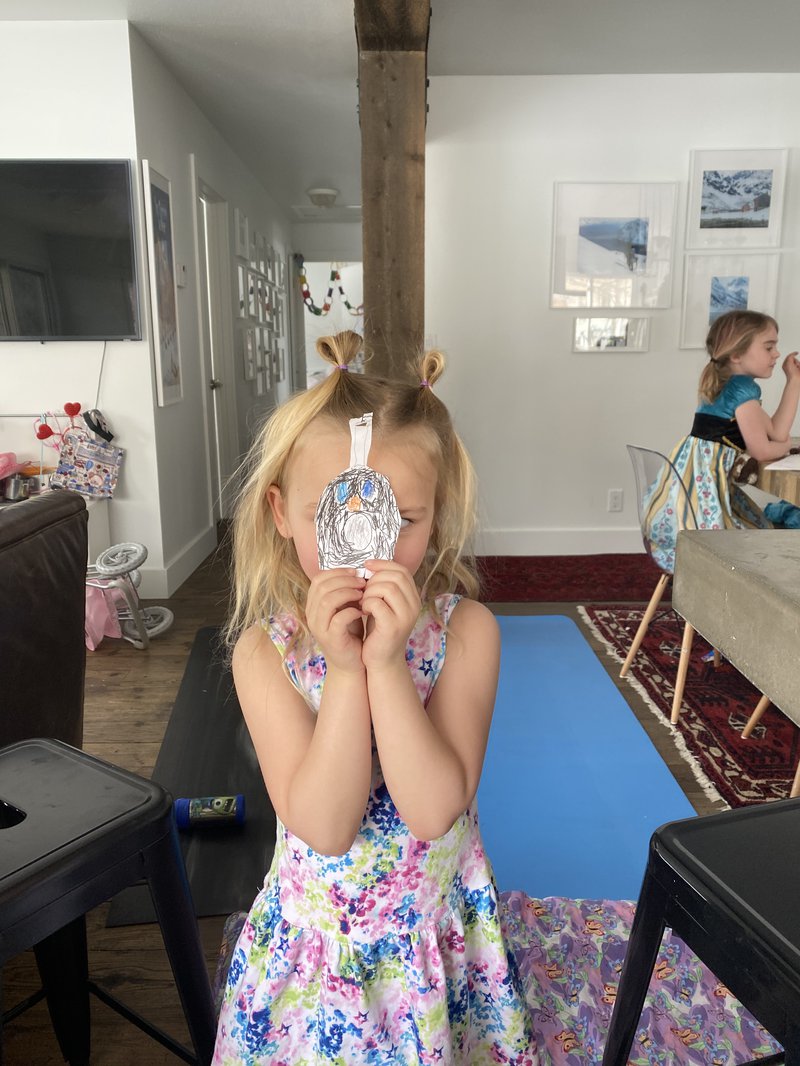
Animal Puppets
Materials:
- Paper
- Coloring tools,
- Glue
- Scissors
- Popsicle stick or pencil or stick from outside works great too
These little critters will make perfect characters for puppet shows or play spaces after they're created, and are great for all ages! Draw and color in your favorite animal, cut out the shape, stick to a popsicle stick, set up a puppet stage and let creativity soar with a kid run puppet show performance.
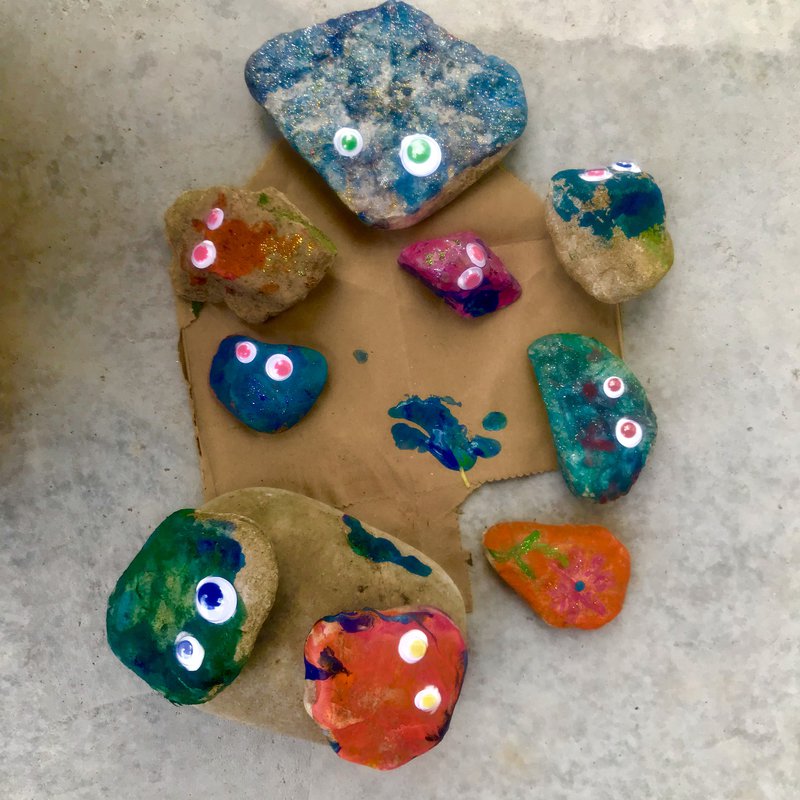
Painted Rock Babies
Materials:
- Rocks (Hunt for them in your yard or while out on a hike or walk!)
- Paint Supplies
- Glue
- Glitter, stickers, or other creative decorations
This is one of my favorite activities to do with kids. Rock babies are cute, fun to make, and encourage kids to explore in nature. Your kids can place them throughout the garden during the summer time. Come up with creative places outside to let your rock babies live or leave a treasure hunt map in a friend's mailbox so they can find the hidden rock nearby!
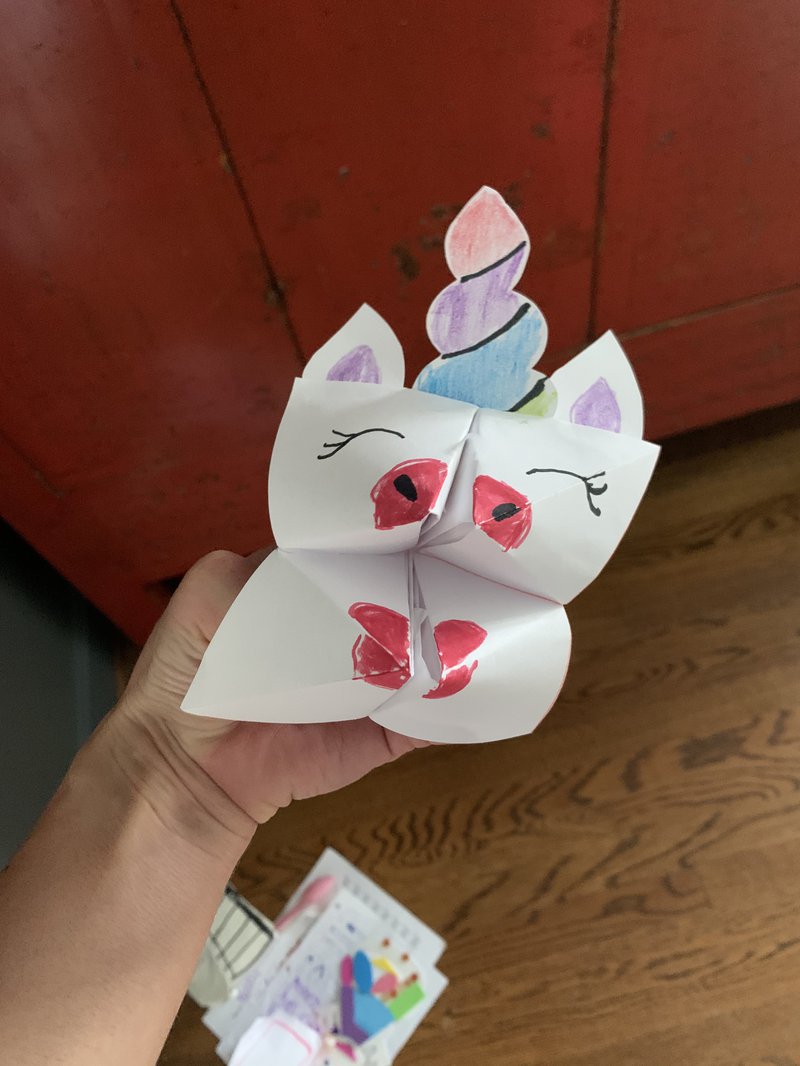
Unicorn Origami
Materials:
- A piece of square paper
- Scissors
- Colorful paper
- Glue
Create your own favorite animal with these helpful instructions from easypeasyandfun.com.
These also double as the “fortune tellers” of our childhood, so the technique may come back to you quickly! Help your child create positive messages (or pictures/stickers), and have fun teaching them how they work!
Peacock Art
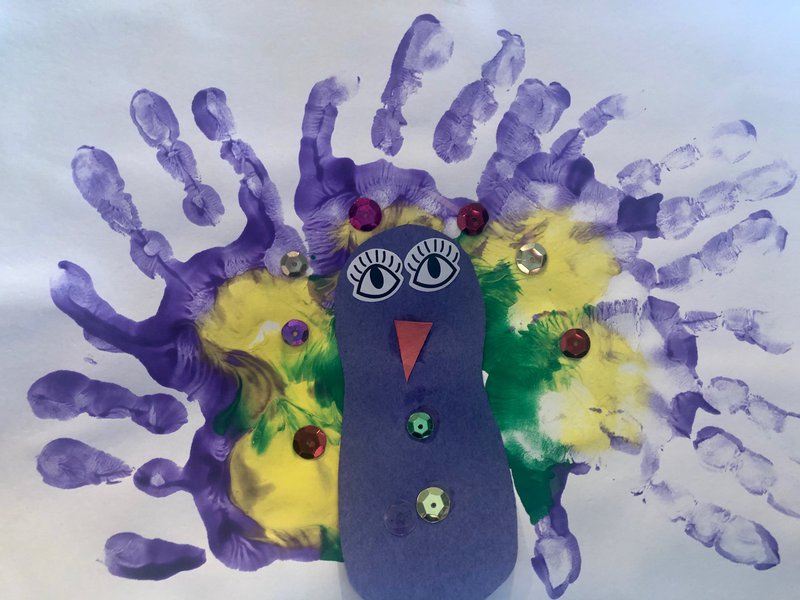
Materials:
- Paint
- Colorful paper
- Sticker eyes
- Fun accents
- A set of little hands
Get elbow deep in some simple sensory fun with finger paints! Getting their hands in the paint is fun, but also a proven method for soothing anxiety as mentioned in our blog, 5 Tools To Unearth A State of Calm.
A Butterfly Book
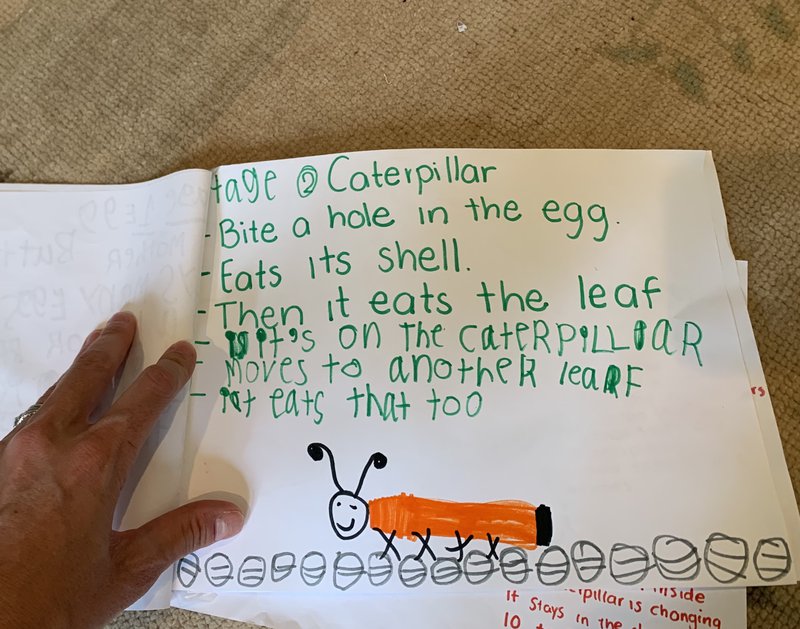
Materials:
- Sturdy paper
- Markers or crayons
- Staples OR a hole puncher and pipe cleaners
Teach your child the four stages of life for a butterfly and inspire them to create their own five page book about their special butterfly. After this project, you’ll find your little ones examining nature a little more closely.
Sweet Eloise shares her wonderful story in this video.
Summer Dreaming
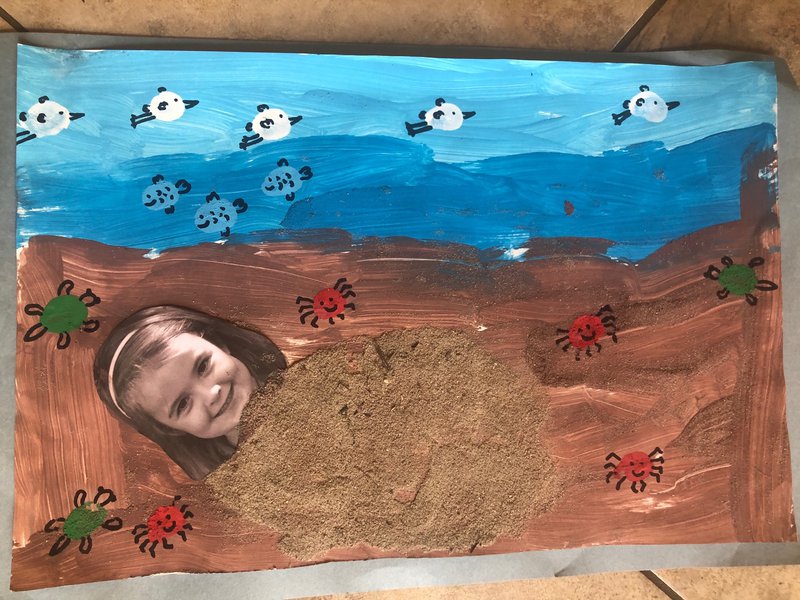
Materials:
- A large piece of sturdy paper
- Paint
- Dot art markers
- Regular markers
- A headshot of your child
- Glue (tacky glue works great)
Get in the mood to dream up your next vacation with your partner (as suggested in 5 Ways To Nurture Your Relationship During Social Distancing) by picturing a perfect beach day with your kiddos while creating a piece of art!
Clothespin Bugs
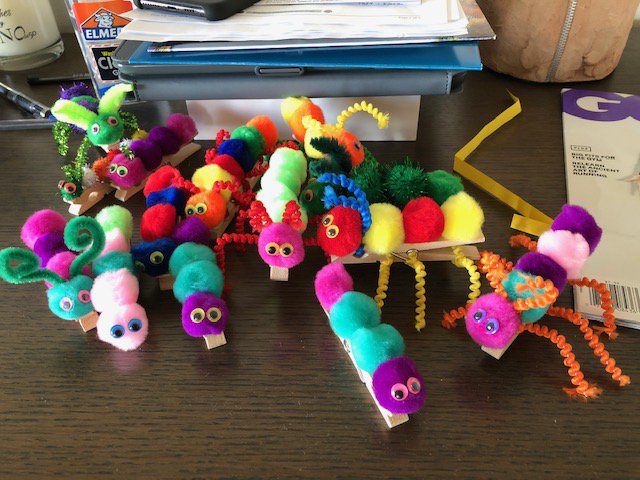
Materials:
- 1” poms in assorted colors (or cotton balls colored with markers in a pinch)
- Colorful pipe cleaners (4 - 6” pipe cleaners per “bug”, 3 for each pair of legs and 1 for antennae, or 12” pipe cleaners cut in half)
- Elmer’s or other washable glue
- Googly eyes
- Wooden clothes pins (or colored plastic ones)
There are so many ways to use your creativity when designing these adorable little bugs!! This is fun for any age and your family can quickly create an army.
When you’ve completed ten, use them as a hide-and-seek prop. You’ll get familiar with your children’s “seek” levels by making the hiding spots more difficult each time!
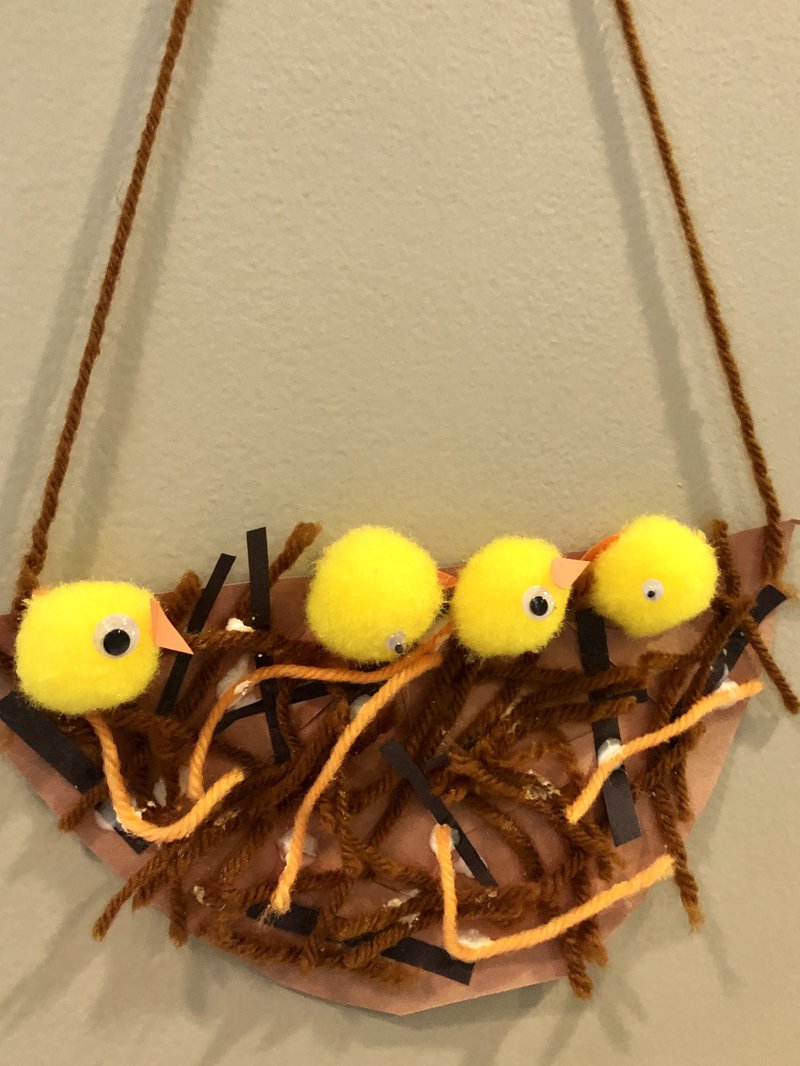
Baby Bird Nests
Materials:
- Construction Paper or Card Stock
- Markers
- Yarn
- Poms
- Googly eyes
Cut construction paper or card stock in the shape of a nest. Draw lines to make it look like a nest. Add approximately two-inch pieces of yarn to the surface of the nest for texture. Glue a pom for each chick you want in the nest and add a googly eye or two to each. Fold construction paper in half and cut small triangles and glue onto the poms as beaks for the chicks. Punch a hole in the top corner on either side and tie the ends of a piece of yarn to each so you can display your nest.
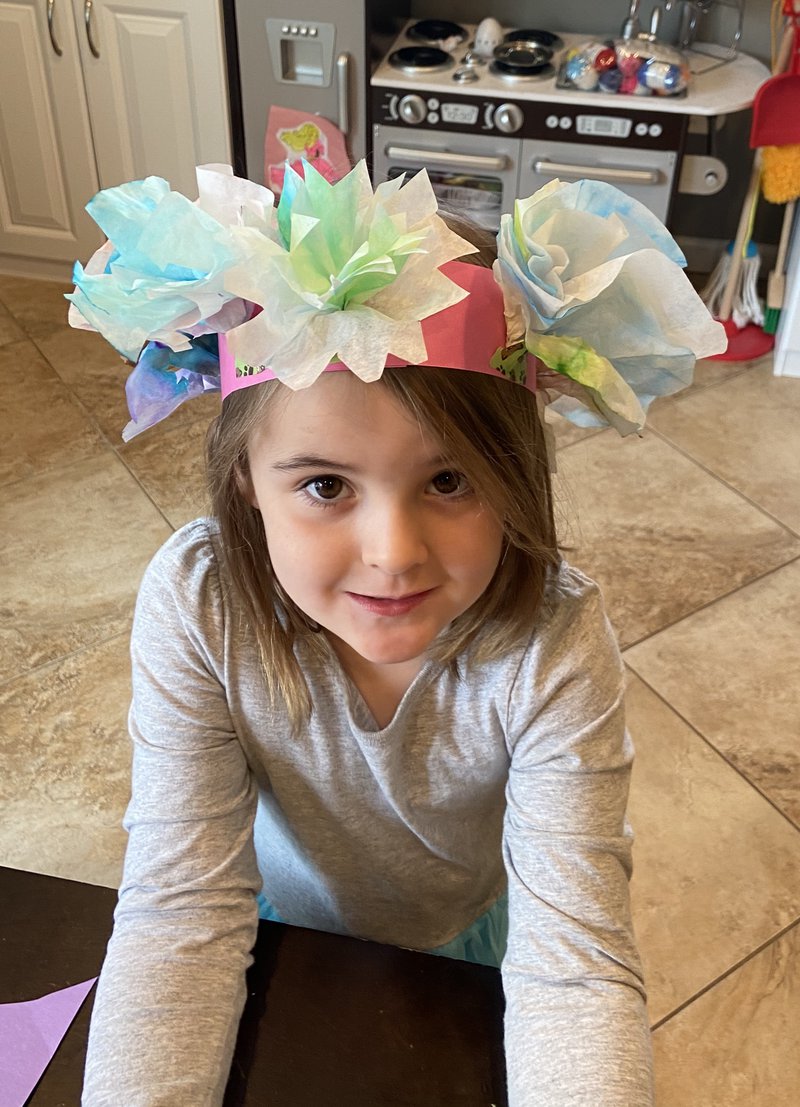
Flower Crown
Materials:
- Coffee Filters
- Markers
- Spray water bottle
- Card stock
- Tape
- Ribbon
Take a stack of three coffee filters and fold them in half and then in half again. Draw vertical lines and patterns of different colors across them on both sides and saturate them with a spray water bottle. Let them dry. When they are dry, cut different patterns on the ends to make the shapes of different kinds of flowers, small triangles, curved cuts, etc. If you prefer small flowers cut about half an inch off the end before creating the patterns.
Separate them and shift their positions before placing them back together and twisting the bottom into a point or fold. Pull the paper apart gently and fluff a bit so it looks like a beatiful flower. Punch holes about two inches apart (an inch for small flowers) on a piece of card stock about the size of a thick ruler and pull the ends of the flowers through the holes and fold and tape on the reverse side.
You can either make a crown, sizing the card stock to your child's head before completing, or punch holes at each end of an inch or so wide card stock about 6 inches long and pull a ribbon through to make a sweet little headband (we prefer smaller flowers for the headbands!)
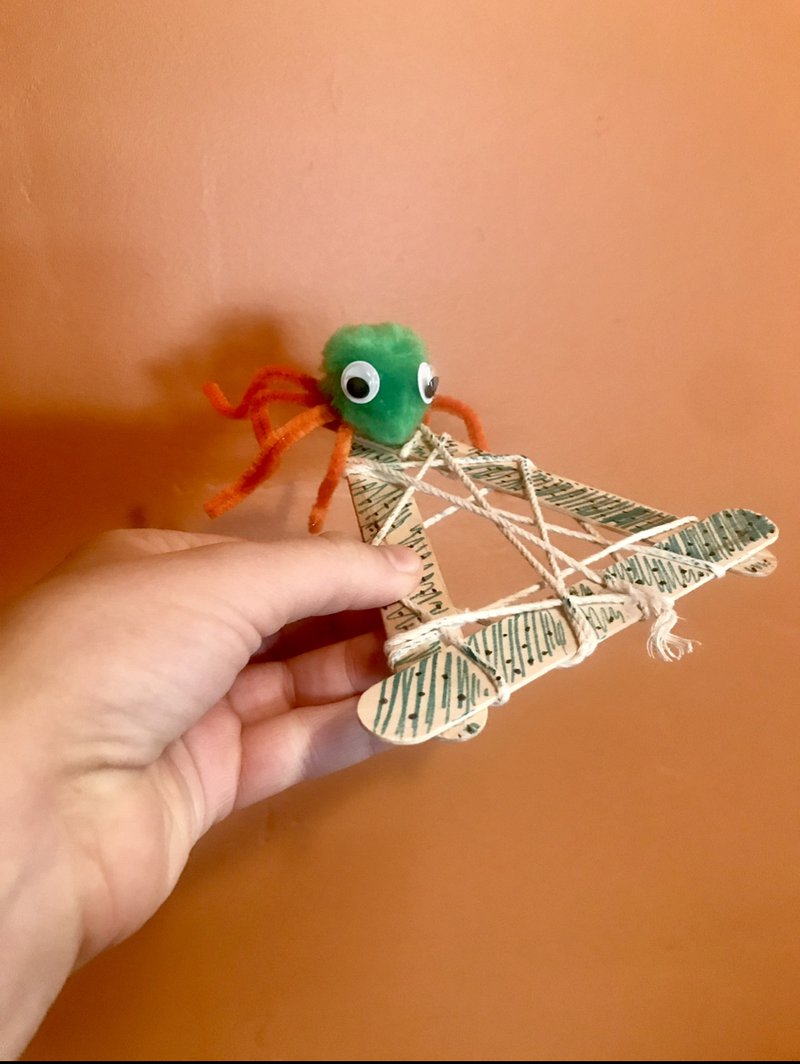
Spiders Web
Materials:
- Pom Poms
- Posicle Sticks
- String
- Decorating Supplies
- Googly Eyes
- Glue
- Pipe Cleaners
To make this furry friend, you're going to want to start off by glueing three popsicle sticks together to make a triangle. After this has dried, allow your children to decorate this frame. Glue one end of the string down or tie it in a knot so that it is secure to the popsicle sticks. Carefully weave and wrap the string around to create the spiders web! Finish it off by glueing or tying the rope off. To create our spider friend, we'll want to cut the pipe cleaners to the appropriate size for legs, give them a little bend, and glue 4 to each side of the pom pom. Glue on the eyes, and then attach the little pal to its web!
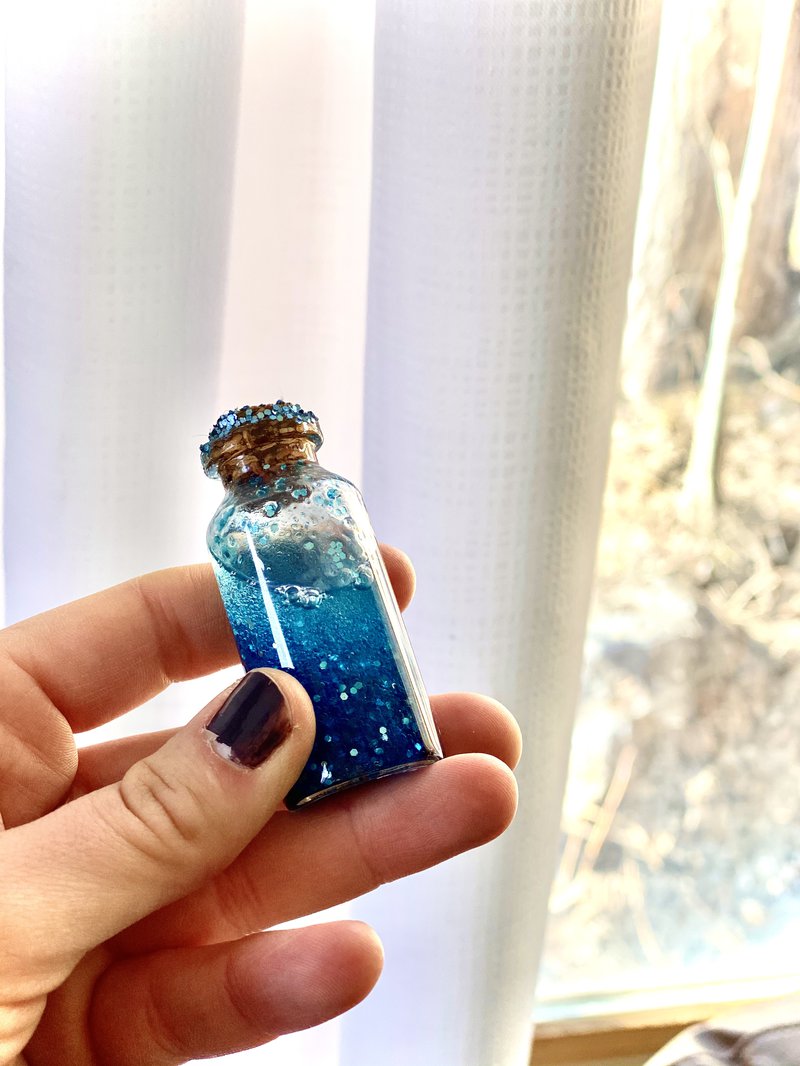
Ocean in a Bottle
Materials:
- A bottle with a lid
- Mineral water
- Glitter
- Seashells, rocks, or whatever friends you'd like to live in your ocean
- Hot glue gun
Begin this fun craft by helping your child fill their bottle with glitter and decorations. Once they've finished, help them fill the bottle with 3 parts mineral water and one part water. Seal the lid off with a hot glue gun and some glitter and give it a shake! Watch your ocean glimmer and say hello to all of the creatures that inhabit it!
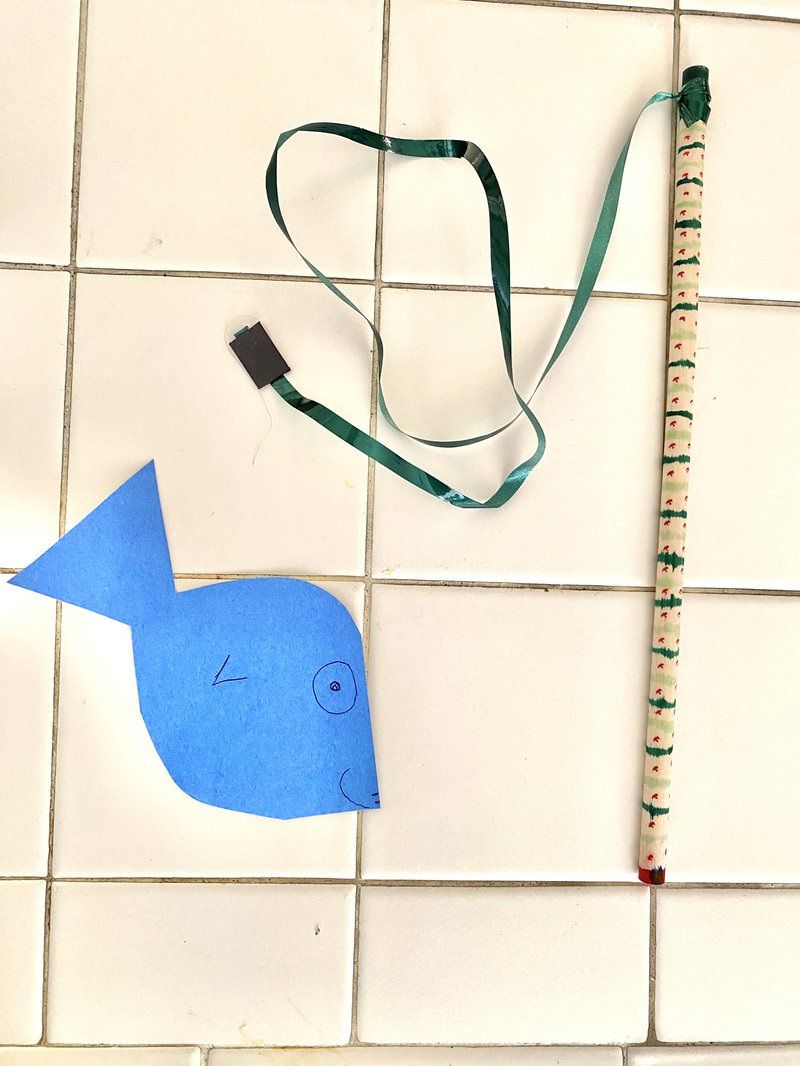
Day on the Lake
Materials:
- A 2 foot long stick or craft dowel
- String
- Magnets
- Construction Paper
- Markers and Crayons
- Rod decorations of your choice (glitter glue, paint, stickers, etc)
- Scissors
Start this craft off by having your child locate a "fishing rod". You can either purchase dowels at the store, or encourage a "hunt" for one in your own backyard. Once a stick is located, have your child decorate it with glitter, stickers, rope, etc. Get creative if it's a stick from nature! Once the rod is ready, tie and glue a rope about 1-2 feet long to the end of it and fasten a magnet to the opposite end of the rope so it hangs off.
After the rod is complete, your children can begin creating their fish! Use construction paper and a printable fish cut out such as this one to draw your fishes outline. Cut them out and let your children decorate accordingly. Try not to stick anything heavy to the fish unless you have a really strong magnet system. Once the fish is ready, attach it's magnet to it!
The best part about this craft, is it doubles as a game. Have your children make multiple fish and see how fast they can catch them all! Happy fishing!
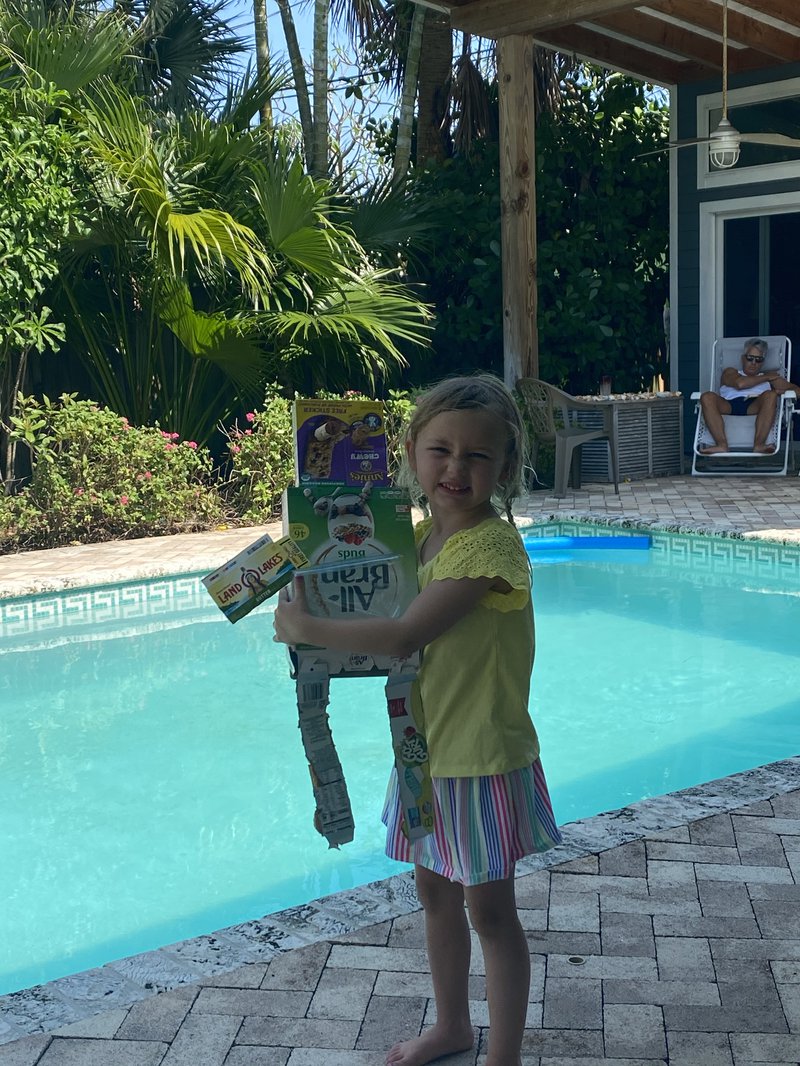
Trash Robots
Materials:
- Trash of your choosing for body (food boxes, paper towel rolls, cans, etc.)
- Tape
- Glue
- Bottle Caps
- Shells
- Various creative decorations
Collect empty boxes and usable trash and grab tape, glue, bottle caps, and maybe even some shells and let them rock it! Build a robot body with your cereal boxes, arms with smaller boxes, cans or tp rolls, and use bottle caps for eyes! Get creative and let your kids use their imaginations!
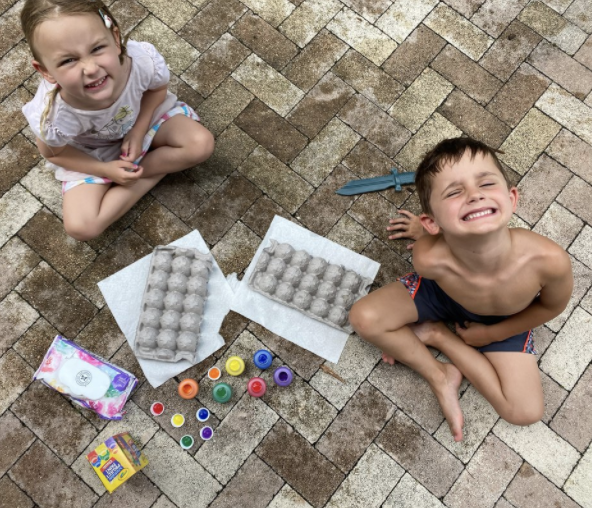
Egg Carton Finger Painting
Materials:
- Egg Carton
- Paint
- Decorations of your choosing
- Honest or other wipes (rinse between using colors)
- Paper towels or other base layer
To start off, get your creativity space in order! This is a fun project to do outside in case it gets messy. Lay down a sheet to avoid getting paint on anything, consider letting the kids paint in the nude, and lay your egg cartons upside down! The kids will love dipping their fingers into the colors and decorating. The textures are great for little learners to experiment with too!
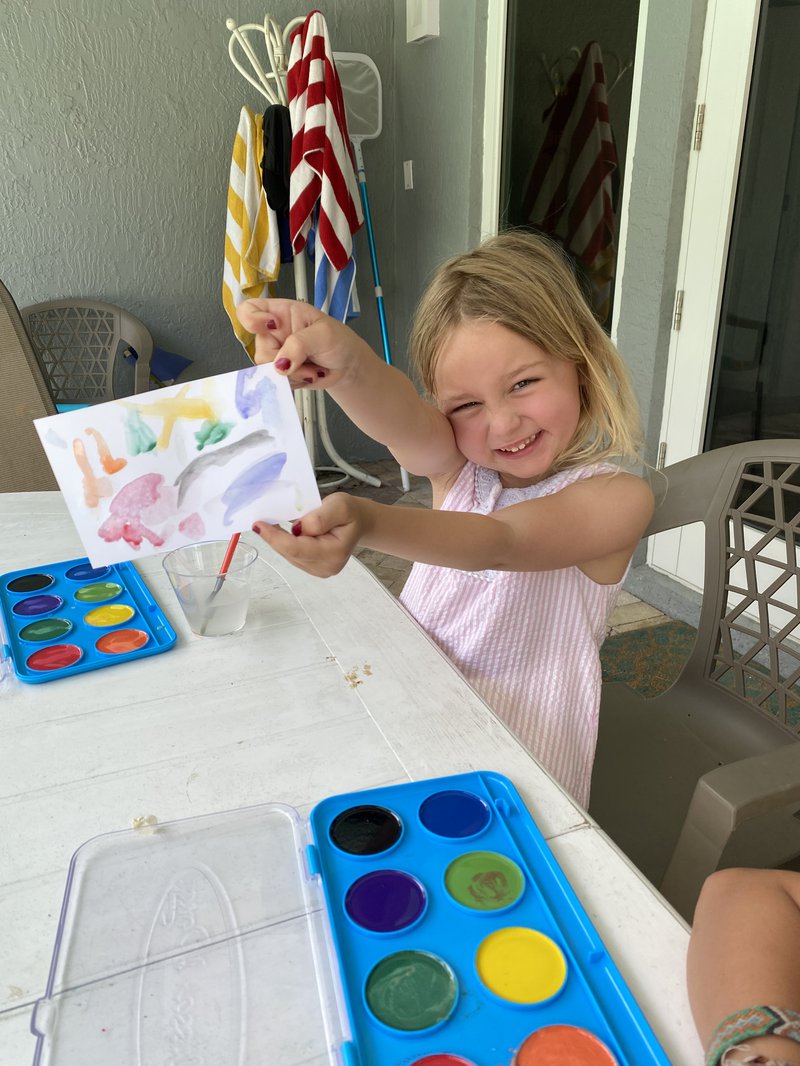
Watercolor Postcards
Materials:
- Blank postcard, or make your own!
- Watercolor paint and brush
- Stickers or any other decorations
- Pen, marker or crayon to write a note
- A stamp
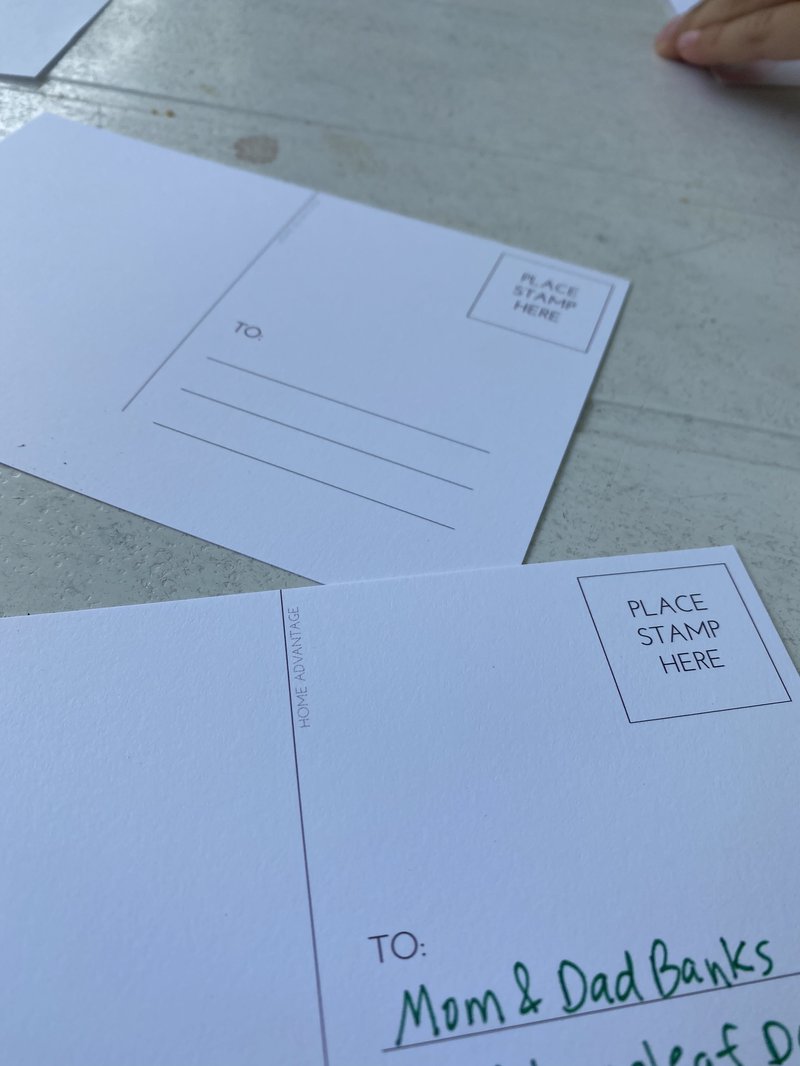
Teach your kids to get creative with mail! Decorate postcards with watercolors and whatever other decorations you have before writing a little note to your loved one, attaching a stamp, and sending it off. Mail is a great way to stay connected with loved ones during this period of physical distancing. There is no better time to bring back this special form of communication!
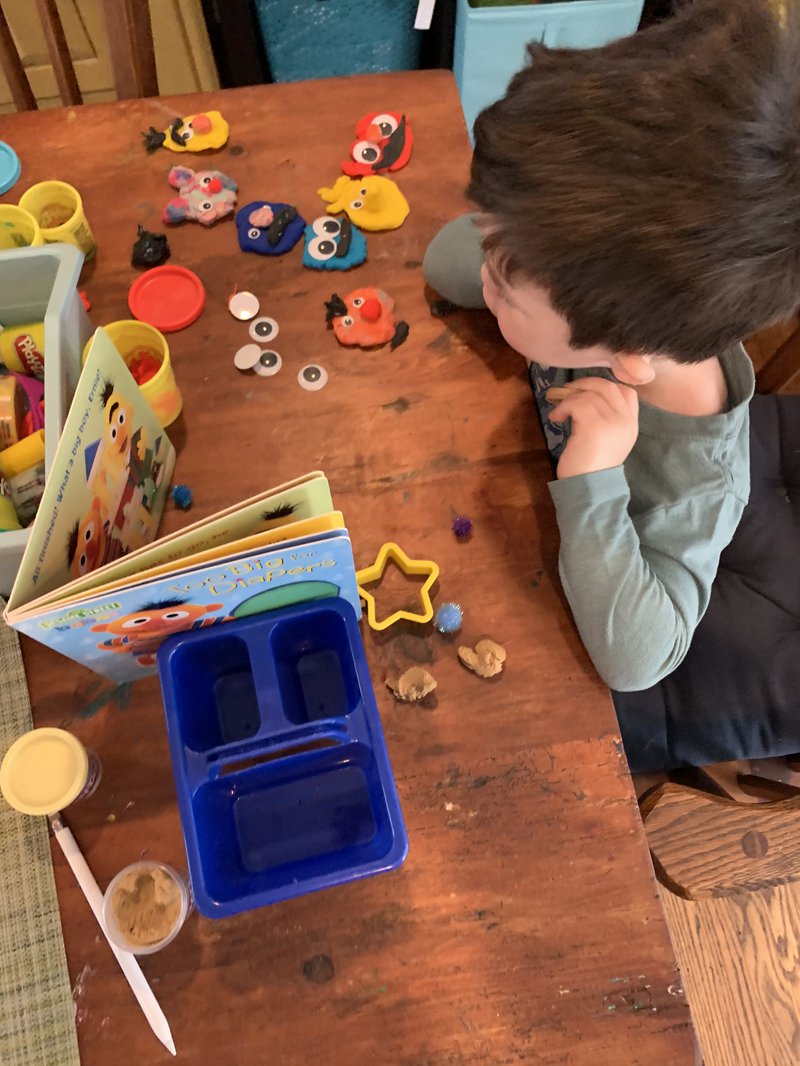
Play Doh People
Materials:
- Play Doh
- Googly Eyes
- Any Play Doh Tools
- A favorite character book
Start off this craft by reading a favorite character book with your kid(s), then invite them to create Play Doh people or shapes they saw in the book. We ended up most inspired by the Sesame Street characters in our potty training book "Too Big for Diapers."
Younger ones will need more assistance flattening and rolling but can be great at assembling. After you've got the bodies down, use Googly eyes to animate the characters and be sure to practice identifying parts of the face and body. After complete, ask your child if they want to re-read the story and use their Play Doh people to talk, add some extra fun to the story, or even imagine a whole new one!
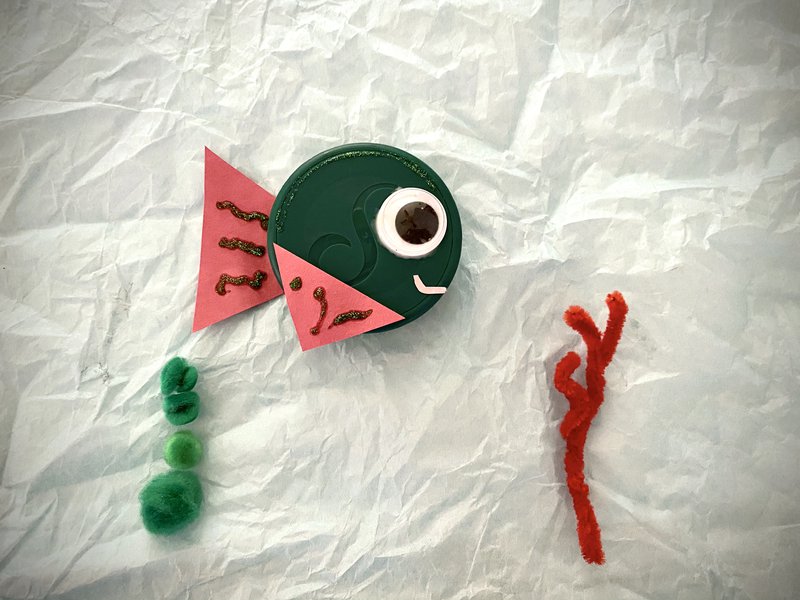
Bottle Cap Fish
Materials:
- Blue paper (for base)
- Bottle caps
- Colored paper
(for the fish tails) - Google eyes
- Green tissue paper, pom poms, or glitter glue for seaweed
- Glitter glue (we received ours from our friends at Craftprojectideas.com)
- School glue
To make this cute bottle cap fish scene, you'll want to start out with your fish. Glue a googly eye to your bottle cap to make an eye, then cut out a triangle for the tail and one for the fin. Glue these to your bottle cap and let dry. Now you'll want to attach your fish to the blue paper with glue.
Begin decorating your under water scene! I used pom poms for my seaweed, although any decorations will do and add as many fish to your scene as you wish. Get creative with your kids! And don't forget to give your fish a smile!
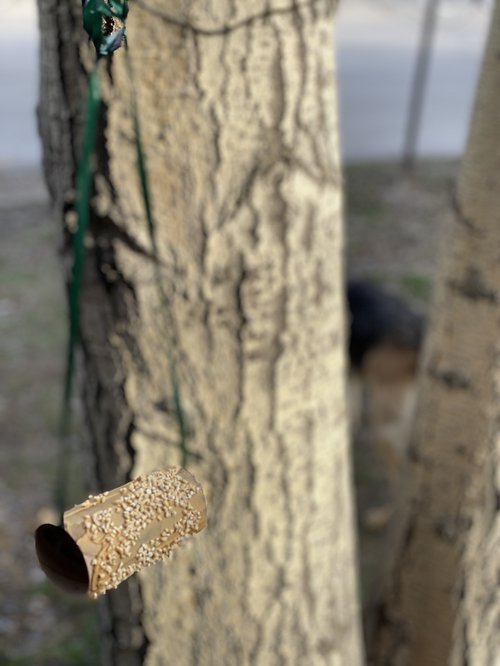
Toilet Paper Roll DIY Bird Feeders
Materials:
- Toilet Paper Roll
- Peanut Butter
- Bird Seed
- String
To begin, you'll want to string a loop of the rope through the toilet paper roll so that it will hang nicely on a branch outside. Second, cover the entire roll with a coat of peanut butter. Finally, roll the toilet paper roll around a plate full of bird seed. Voila! Go hang up your home made bird feeder and watch for new friends to arrive and enjoy your treat!
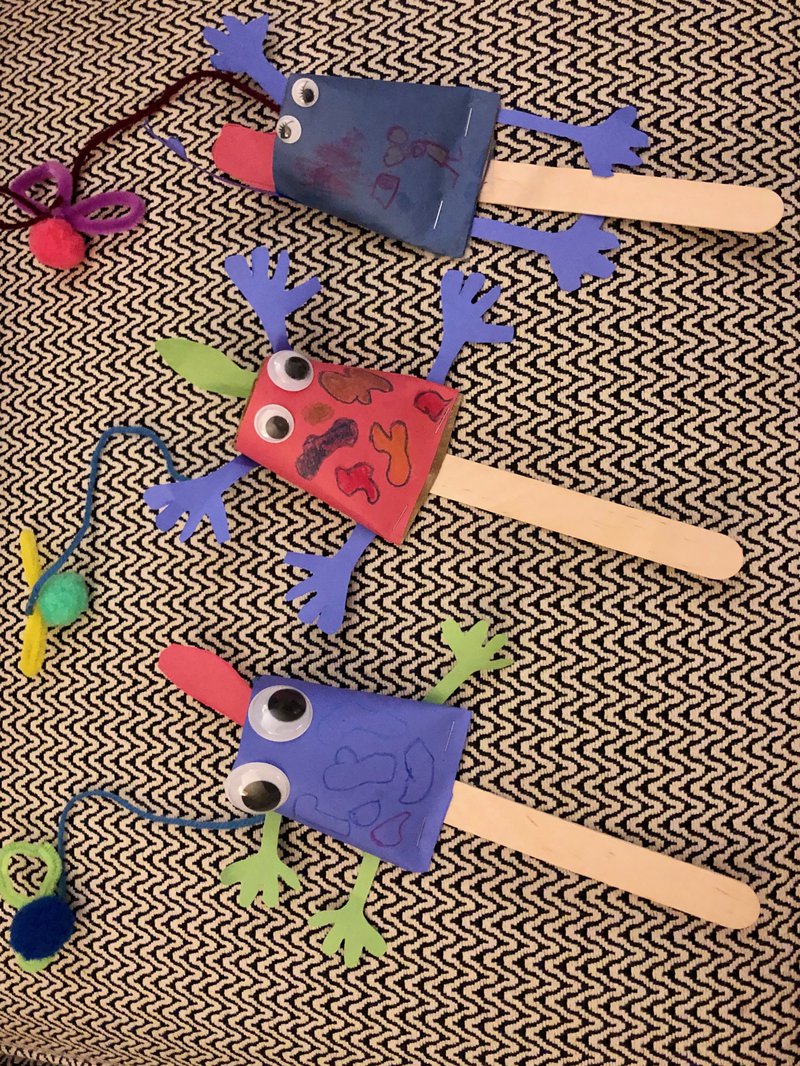
Toilet Paper Roll Frog Fly Catcher
Materials:
- Toilet Paper Roll
- Popsicle Sticks (or a straw)
- Yarn, string or ribbon.
- Pipe Cleaners
- Construction Paper
- Googly Eyes or sticker eyes
- Colorful Poms
- Scissors
- Stapler
- Hot glue gun (helpful but optional)
Cut your toilet paper roll in half. Measure it against the construction paper and mark it's height and cut a rectangular piece large enough to wrap around the tube. Put a line of glue on one end, wrap and put another line of glue where the other end will stick. Put glue on either side of the inside of the base and flatten it, or place two staples on either side. Fold another piece of paper in half three times so you get four legs that match, and cut them slowly. Glue each of them to the body of the frog. Color or paint the frog on the other side that the legs are glued on and place or draw some eyes. Cut a piece of paper for the tongue and glue it inside the roll on the same side that the legs are glued to. Cut the pipe cleaner in half and bend it into two loops and wrap it in the middle like a bow. Cut off the excess, and hot glue it to the colored pom. The longer your string is the harder the game will be, so we used about a 6-8 inch string. Glue your yarn to the other side of the pom as the fly wings, and then glue the other end to around the same spot as the tongue. Glue on you popsicle stick to make the toy a bit easier to use!
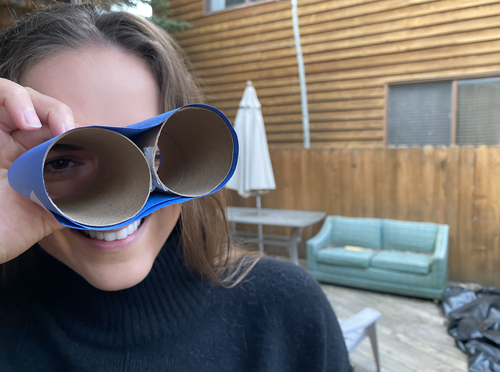
Toilet Paper Roll Binoculars
Materials:
- 2 Toilet Paper Rolls
- Glue or tape
- Paper
- Decorations
- Yarn or string
Start off by taking your two toilet paper rolls and glueing or taping them together. cut a sheet of paper to match the length around, and decorate it to your liking. Afterwards, wrap the paper around the two rolls, glueing it firmly to the edges. Attach a string to the ends to make it a necklace and watch for birds coming to snack on your feeder!
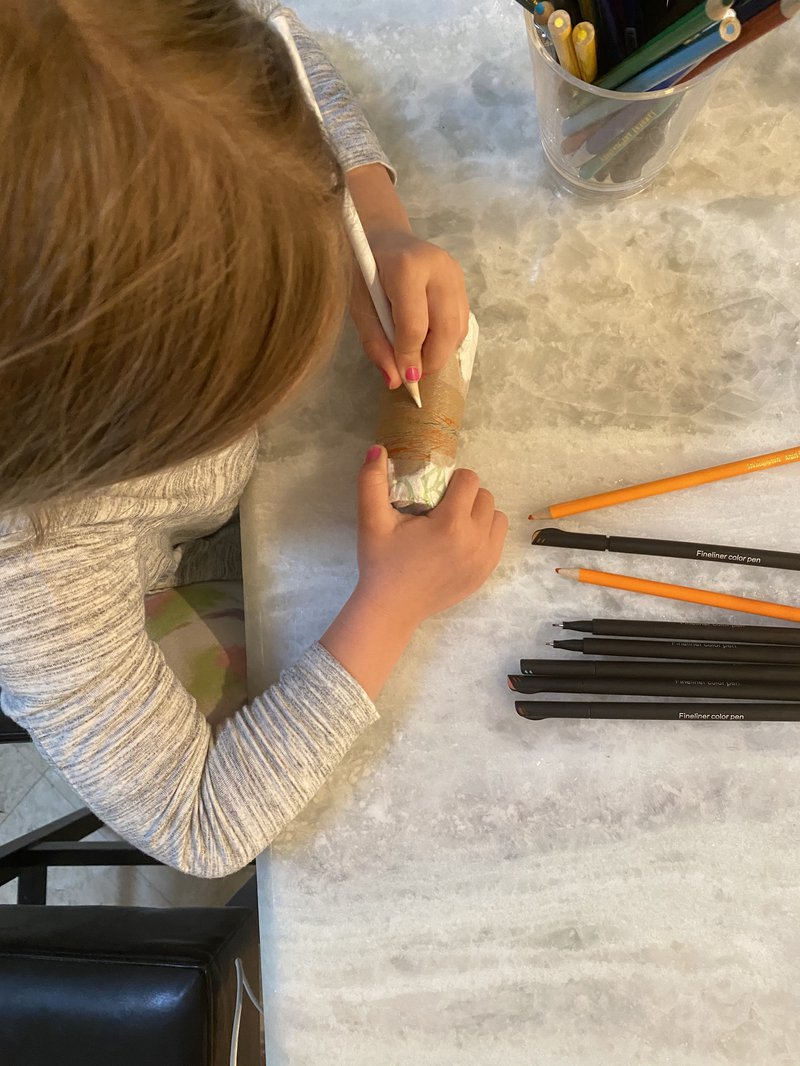
Toilet Paper Roll Maraca
Materials:
- Toilet Paper Roll
- Coloring tools
- Glue
- Tape
- Uncooked Macaroni, rice, pebbles, or something to create the "shake" noise
Start off by taping over one end of your toilet paper roll. Fill it halfway with your macaroni or rice and then tape over the other side. Smaller children might need help with this. You want to make sure none if the pieces will fall out and create a mess. Decorate your maraca by covering it with paper, coloring it, or get creative with other ideas! Bring your new instruments to The Lara and Joe Show on Saturday morning to participate in their rock and roll sing alongs!
Jump Rope
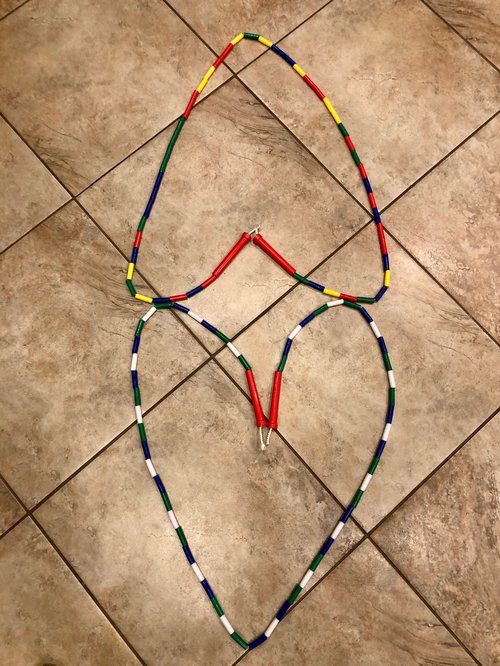
Materials:
- Macaroni or tube beads
- Rope (nylon or polyester are durable options)
- Jump Rope Handles
You can buy the tube beads at a local craft store and handles at a hardware store and purchase rope at either place. If you use noodles, painting them beforehand is an option for a two part craft. Jumpers under five feet tall should use a rope around seven feet long. Tie a knot at the end of the rope to secure the handle and then create a pattern or just have colorful fun as you string your beads. At the other end, place the handle on before tying the other end in a secure knot.
You can also just buy a kit online, there are numerous affordable options available.